
Striven Integrations
Authorize.net Integration
Guide
-
Overview
Authorize.net is a payment gateway that enables your business to accept payments made online to your merchant bank account. You will have the ability to accept payments from your Customers using a variety of payment types, such as Visa, Mastercard, American Express, Discover, and eCheck. Integrating Authorize.net with Striven allows you to record those payments and document your accounting transactions in a more clear-cut and straightforward process.
This guide will provide the settings and steps to successfully activate the Authorize.net Integration in your Striven system.
-
Permission Required
In order to configure the settings for the Authorize.net Integration, you will need to have the permission “Payment Integration – Add/Edit” included within your assigned Striven User Role. If you do not have access, you may want to reach out to your Striven System Administrator for further assistance.
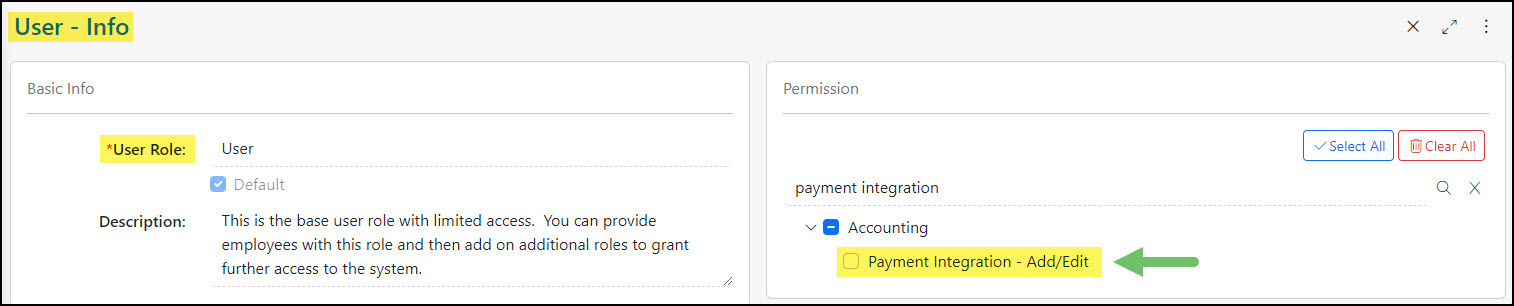
Example of User Role Permission Required to Access Payment Integration Settings in Striven

-
Getting Started
Before proceeding with the Authorize.net Integration activation, there are a couple of facts you may want to consider:
- Authorize.net only serves clients residing in the United States and Canada.
- Puerto Rico is the only US Territory they service.
- Limited services are available for Australian clients as a gateway option.
- They have additional transaction fees. Visit Authorize.net’s Pricing Page for more information about their pricing options.
Create Your Authorize.net Account
The first step will be to create your Authorize.net account, if you do not have one already. You may have completed this step with your Assigned Striven Business Analyst through a third party representative. If not, you can complete this step directly from the Authorize.net website.
- Authorize.net only serves clients residing in the United States and Canada.
-
Turning on the Integration
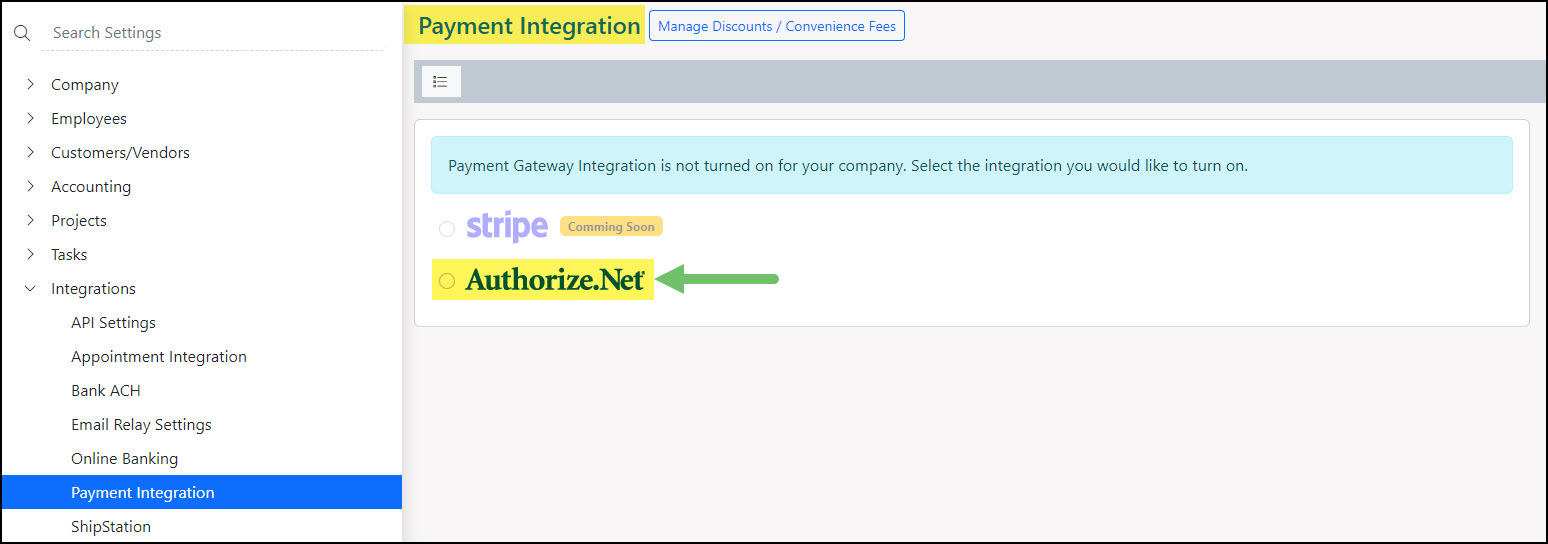
When you are ready to proceed with the Integration activation in Striven, you should navigate to:
Company → Settings → Integrations → Payment Integration
On this settings page, start by checking the Authorize.net checkbox to turn on the Integration.
Example of Payment Integrations Settings Page for Authorize.net
This will display the options for you to select the Payment Methods you wish to accept, along with the fields to enter your API Login ID and Transaction Key from Authorize.net.
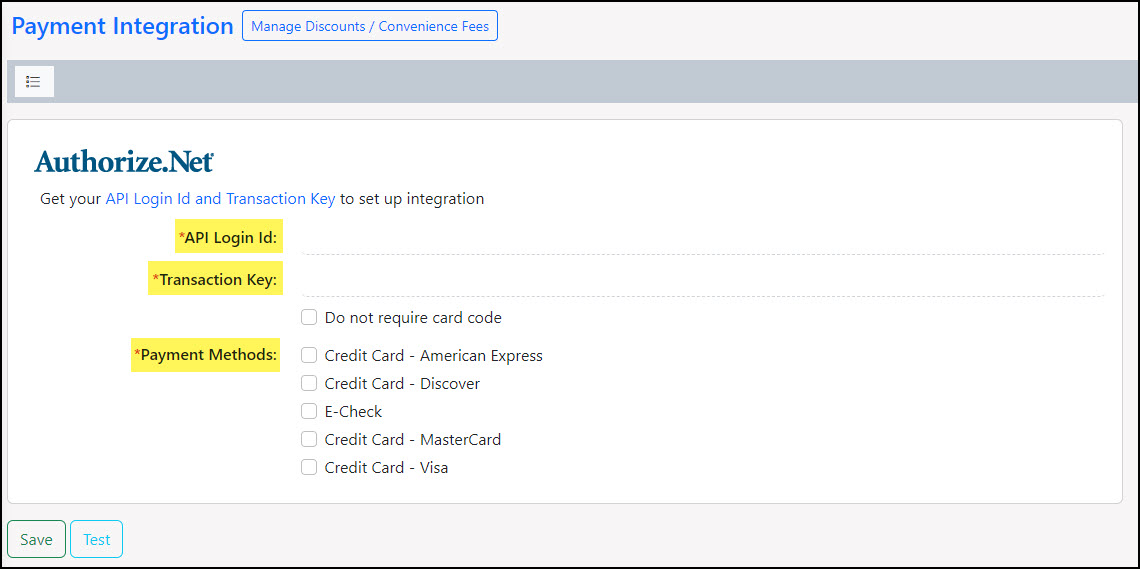
Example of Payment Method Options & Required Credentials for Authorize.net Settings
Collecting Credentials from Authorize.net
There are two (2) pieces of information required from Authorize.net for this Integration to work successfully with Striven: The API Login ID and Transaction Key. This data connects Striven to the Authorize.net Payment Gateway to process transactions and can be found within Authorize.net’s Merchant Interface.
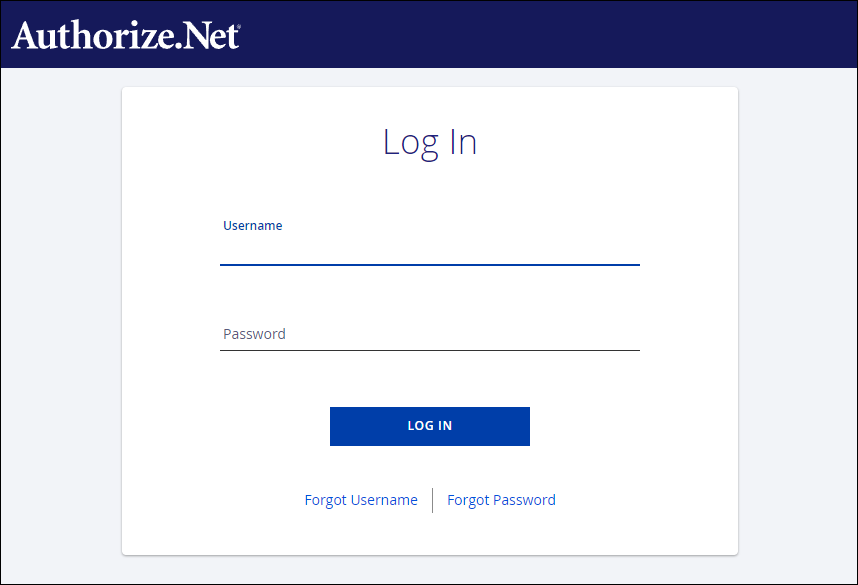
Example of Authorize.net’s Merchant Interface Login Page
The API Login ID is an 8 or more character long complex value that includes uppercase and lowercase letters, numbers, and/or symbols. This value is used to identify your account to the payment gateway when submitting transaction requests from Striven.
Follow these steps to locate your API Login ID in your Authorize.net account:
- Log into your Authorize.net Merchant Interface.
- Click Account from the main toolbar.
- Click Settings in the main left-side menu.
- Click API Credentials & Keys.
The Transaction Key is a randomly generated alphanumeric value from the Authorize.net Merchant Interface that is 16 characters long. This Key is used as an additional layer of security between your Striven system and Authorize.net, similar to a password.
Follow these steps to locate your Transaction Key in your Authorize.net account:
- Log into your Authorize.net Merchant Interface.
- Click Account from the main toolbar.
- Click Settings in the main left-side menu.
- Click API Credentials & Keys.
- Select New Transaction Key.
- To disable the old Transaction Key, click the checkbox for Disable Old Transaction Key Immediately.
- Note: If the Disable Old Transaction Key Immediately checkbox is not selected, the old Transaction Key will expire automatically in 24 hours.
- Click Submit and follow the instructions to request a verification PIN.
- Click Request PIN to have a PIN sent to your email.
- Obtain the PIN from your email and enter it into the Authorize.net page in the Merchant Interface and click Verify PIN.
- Note: As the Transaction Key is sensitive account information and will not be visible at any other time in the Merchant Interface, you will need to save it in a secure location with limited access.
Integration Settings in Striven
After you have retrieved your API Login ID and Transaction Key from Authorize.net, you will want to enter them into the designated fields on the Striven Payment Integration page.
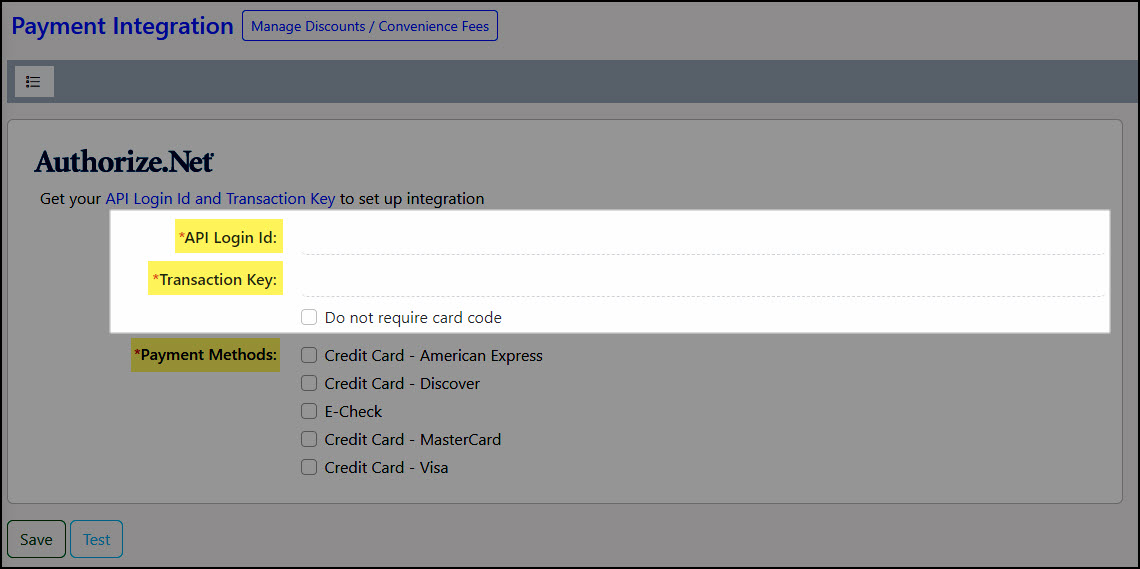
Example of Authorize.net Settings Requirements in Striven
Next, click the Test button to test the connection and ensure the Integration is configured correctly. Click Save to complete the activation.
-
Using Authorize.net with Striven
Once you successfully set up your Authorize.net Integration, options become available in Striven to enable the creation of Customer Payment Profiles to facilitate the process of receiving payments from your Customers.

Have a Question?
Ask the Striven Community
User-sourced how-to’s, feedback, and more!