
Striven Integrations
Stripe Integration
Guide

-
Overview
Stripe is a payment processor that allows business owners to accept payments from Customers using a variety of credit cards, including, but not limited to Visa, Mastercard, Discover, American Express, as well as debit cards. Other payment options include mobile wallets and buy now/pay later services. Stripe is best suited for and has unique features that are geared toward businesses that deal mostly with online sales. Integrating Stripe with Striven allows you to record payments and document your accounting transactions in a more clear-cut and straightforward process.
This guide will provide the settings and steps to successfully activate the Stripe Integration in your Striven system.
-
Permission Required
In order to configure the settings for the Stripe Integration, you will need to have the permission “Payment Integration – Add/Edit” included within your assigned Striven User Role. If you do not have access, you may want to reach out to your Striven System Administrator for further assistance.
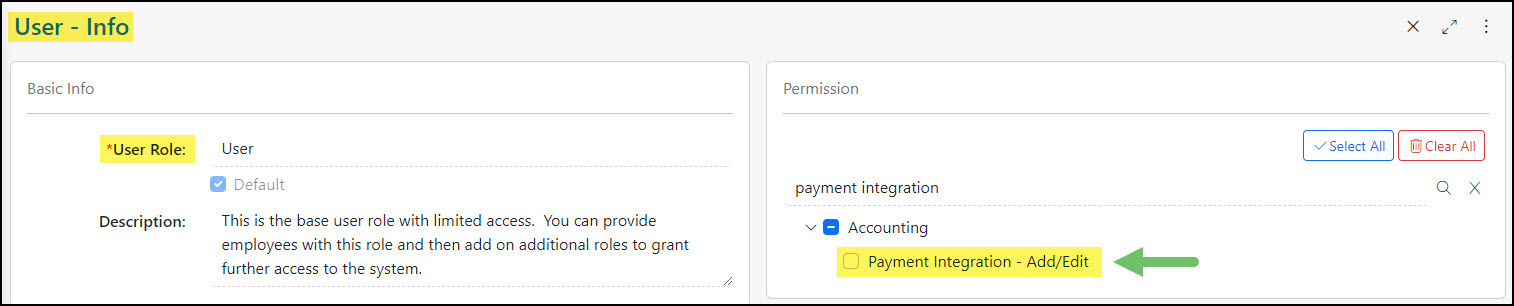
Example of User Role Permission Required to Access Payment Integration Settings in Striven

-
Getting Started
Before you decide to enable the Stripe Integration with Striven, there are a couple of facts you may want to consider:
- Stripe offers international payment processing services, including support for more than 135 currencies and is available to businesses in more than 45 countries. Visit Stripe’s Payment Methods Page to view the available payment method options.
- They have a variety of pricing and account options available. Visit Stripe’s Pricing Page for more information about these options.
-
Turning on the Integration
When you are ready to proceed with the integration activation in Striven, you should navigate to:
Company > Settings > Integrations > Payment Integration
If you do not have any Payment Integrations already enabled, you will be presented with the option to select between Stripe or Authorize.net. Select Stripe and confirm your selection to enable the integration.
- Note: If you already have an Authorize.net Integration configured with your Striven system, you will need to disable it in order to enable the Stripe Integration. You cannot have both integrations enabled at the same time.
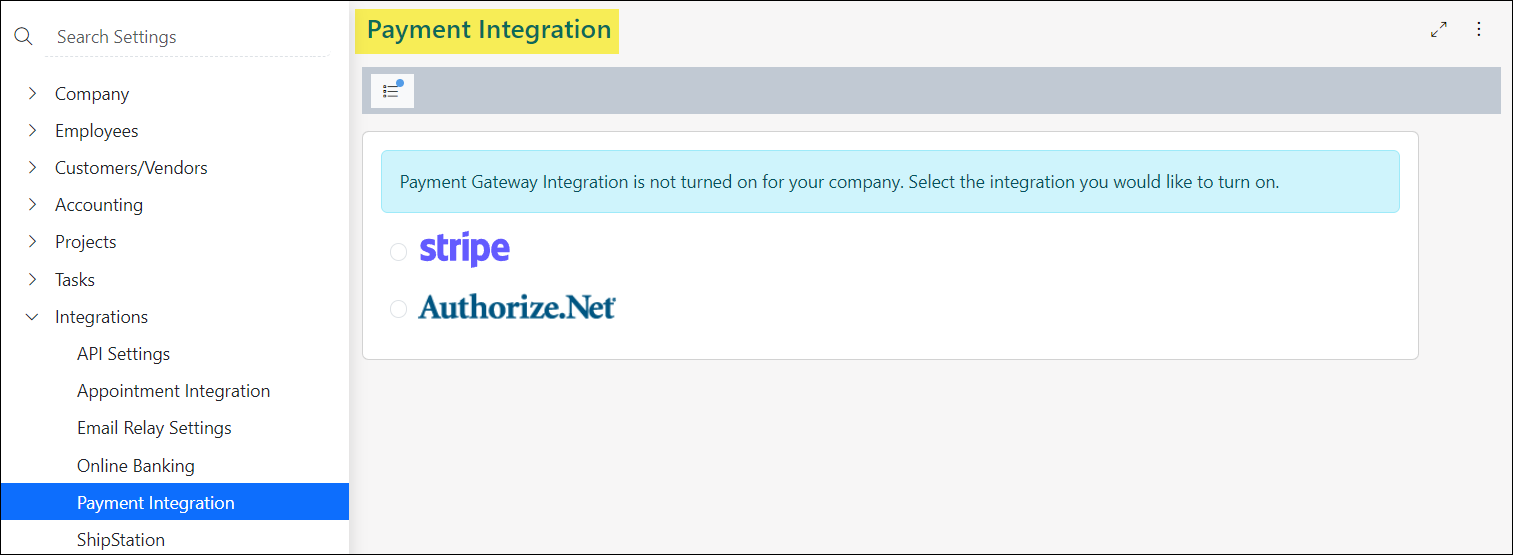
Example of Payment Integrations Settings Page in Striven
You will see a Create a Stripe Account button which you can click to create a new Stripe account, if you have not done so already. If you already have an existing Stripe account, you can click the link to associate your account. Whichever you choose, just follow the prompts to complete the process.
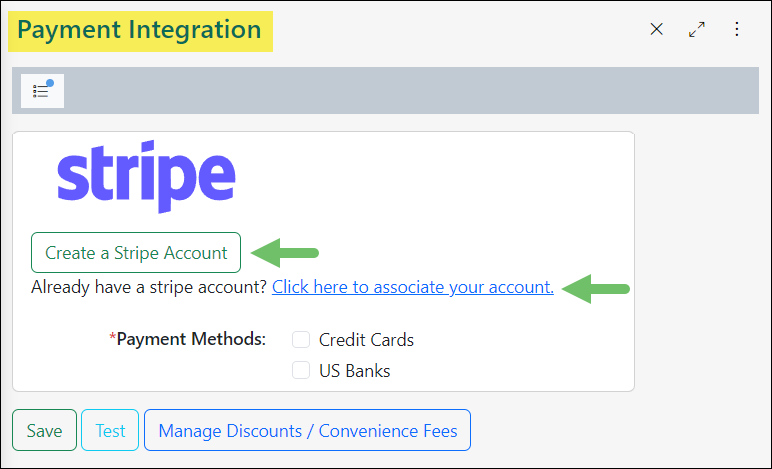
Example of Account Options to Enable the Stripe Integration in Striven
Next, you will want to choose your Payment Methods by checking the box next to the options you want selected.
Example of Payment Method Options on the Stripe Payment Integration Settings Page
- Note: If you wish to configure a Stripe credit card reader with your integration settings, the steps for that will be covered in the next section of this guide.
After you have saved your settings, there are other actions you can take on the Stripe Payment Integration page, such as:
- Test: Verifies the authentication of your Stripe Integration with Striven and confirms that your Striven system is able to communicate with Stripe successfully.
- Disable Integration: Triggers a popup displaying your current integration status and provides options for the following:
- Do not do anything. Continue with Stripe.
- Disable Stripe completely. Any auto-pay/recurring payments set up using Stripe will stop working.
- Disable Stripe for future one-time/recurring payments. Any existing auto-pay/recurring payments set up using Stripe will work while the payment profile is valid. Editing of payment profiles will not be permitted.
- Change Payment Gateway: Displays your current payment integration status and provides the choice to switch to Authorize.net
- If you select to switch, you will be presented with the same three (3) options as the Disable Integration option in order to configure your payment gateway for Authorize.net.
- Manage Discounts / Convenience Fees: Opens the Manage Discounts/Convenience Fees page in Striven to configure your settings for your payment methods.
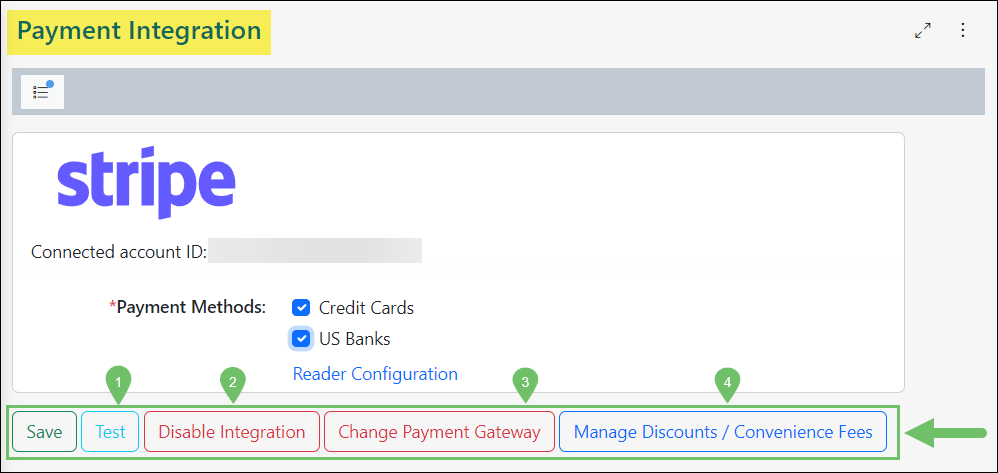
Example of Available Action Options on the Stripe Payment Integration Settings Page
Applying Stripe Payments to a Bank Account
You can choose to have payments captured with Stripe apply directly to a specific bank account within Striven. This option is only available if you have the “Apply Payments Directly to Bank Account” setting enabled within your Accounting Settings.
Once this setting has been enabled, the Payment Integration page will display Account options below each configured payment method. By default, the default bank account for payments configured in your Accounting Settings will be selected. You may use the drop-down menu to choose which bank account you would like to apply the payments to.

Example of Applying Stripe Payments Directly to Bank Accounts
-
Enabling a Stripe Reader
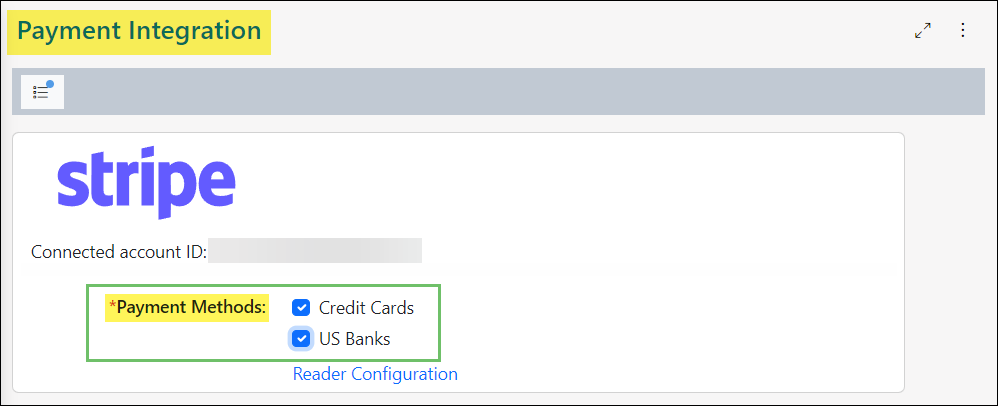
Once you have selected your Payment Methods and saved your settings, you will see a link for Reader Configuration.
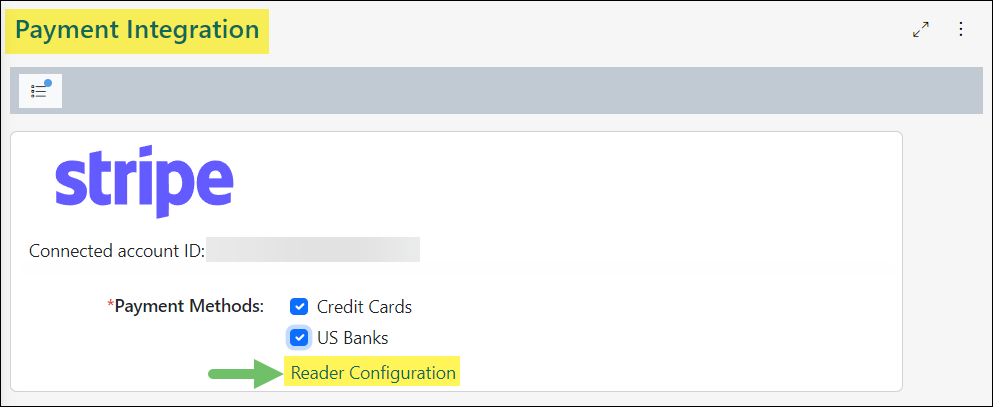
Example of the Reader Configuration Option on the Stripe Payment Integration Page
Clicking this link will display the following details about the Stripe Integration with Striven:
Striven supports integration with the WisePOS E Card Reader offered by Stripe. Readers are only available in certain countries and do not currently support multi-currency.
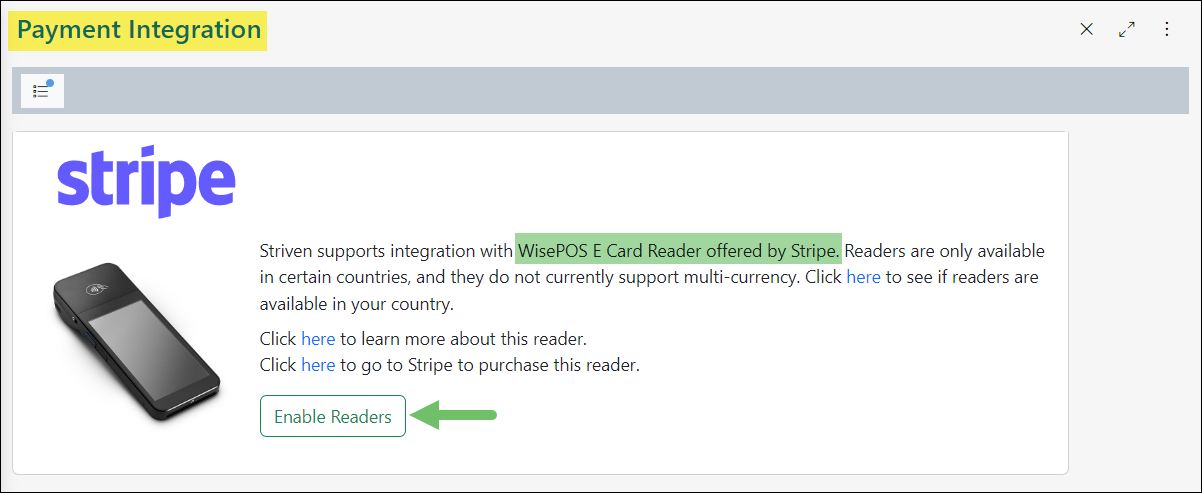
Example of the Enable Readers Button on the Stripe Payment Integration Page
-
Using Stripe with Striven
There are a couple of ways you can process payments with Stripe once your Stripe Integration is successfully set up.
Payments Using the Customer Portal
Customers can create Payment Profiles from the Customer Portal to facilitate the process of receiving payments.
If a Customer has an Open Balance, they can visit the Customer Portal and click on the Pay Now button to submit a Payment.
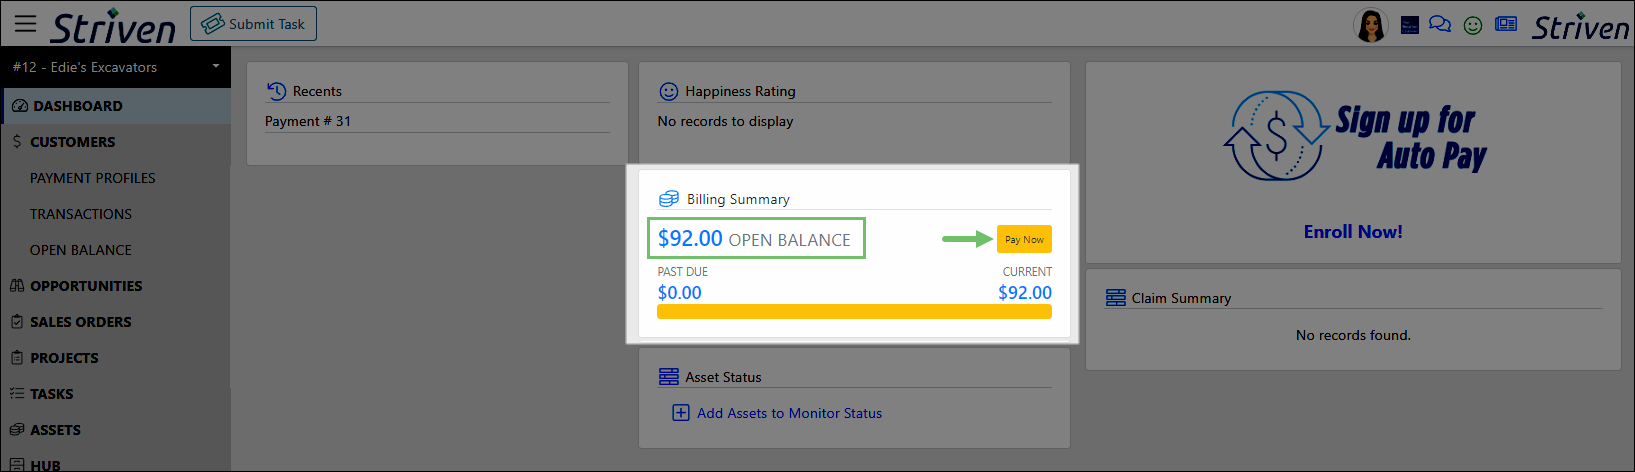
Example of Customer Billing Summary Widget in the Customer Portal
Once the Customer has selected the Invoice they wish to make a payment on and entered the amount they wish to pay, the they can click on the Next: Select Payment Method button to continue.
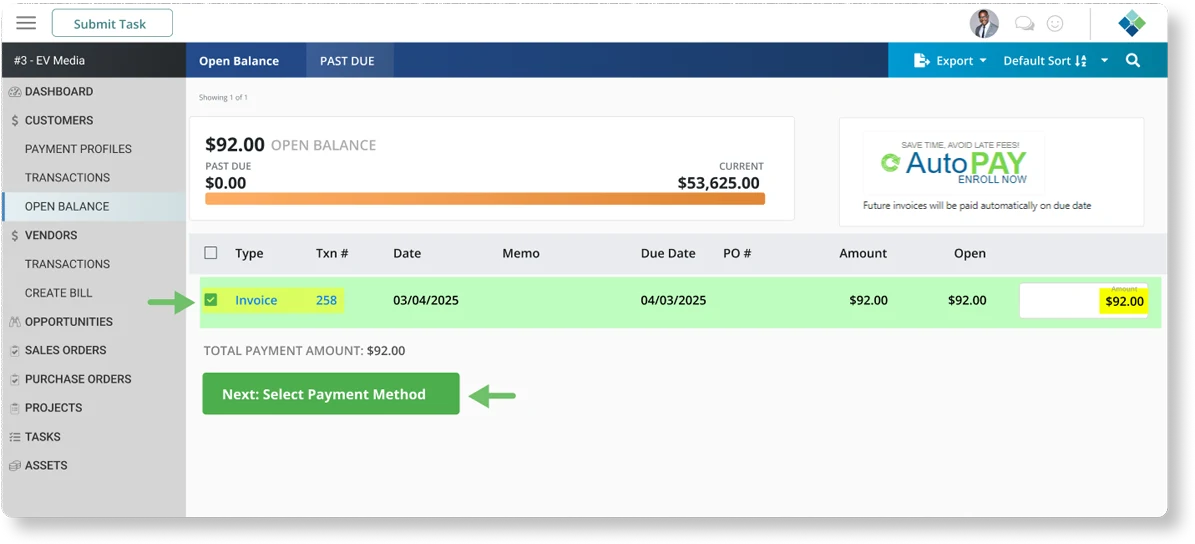
Example of the Open Balance Page in the Customer Portal
If this is the Customer’s first time making a payment through the Customer Portal, they will need to add a new Payment Method. The available payment method options will be based upon those you selected in your Stripe Integration Settings. After the Customer adds their payment method details, they can click the Pay Now button to submit the Payment.
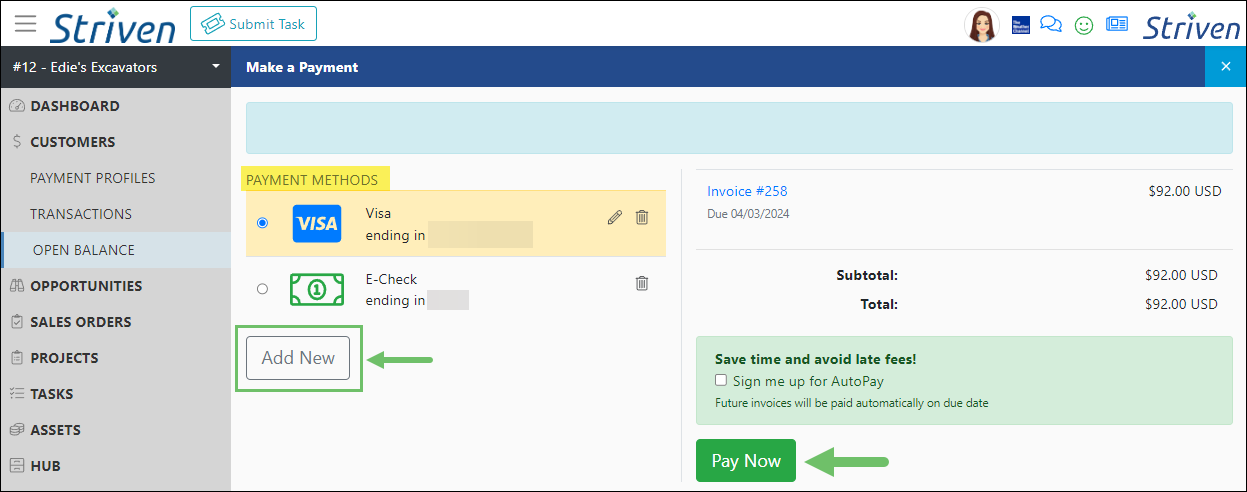
Example of the Make a Payment Page in the Customer Portal
Using the Stripe Reader
When viewing an Open Invoice in Striven with the Stripe Reader enabled, a Use Reader button will display in the top right corner of the screen, next to the Receive Payment button.
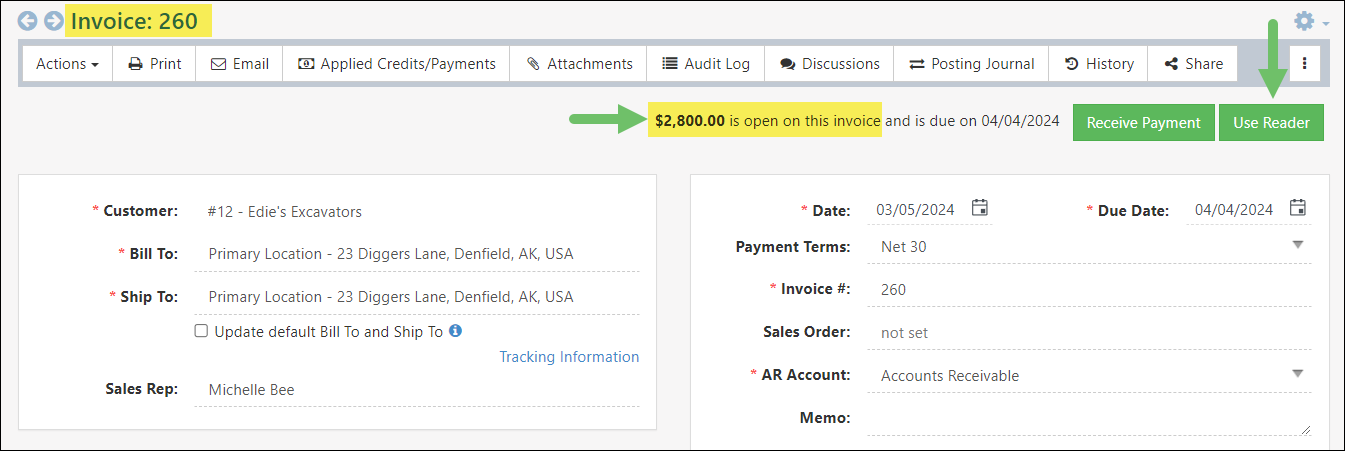
Example of an Invoice with an Open Balance showing the Use Reader Button
Note: When accepting Payments through the use of the Stripe Reader, Convenience Fees will be unavailable and not in effect. Learn more about Discounts & Convenience Fees by reviewing our Discounts & Convenience Fees Guide.
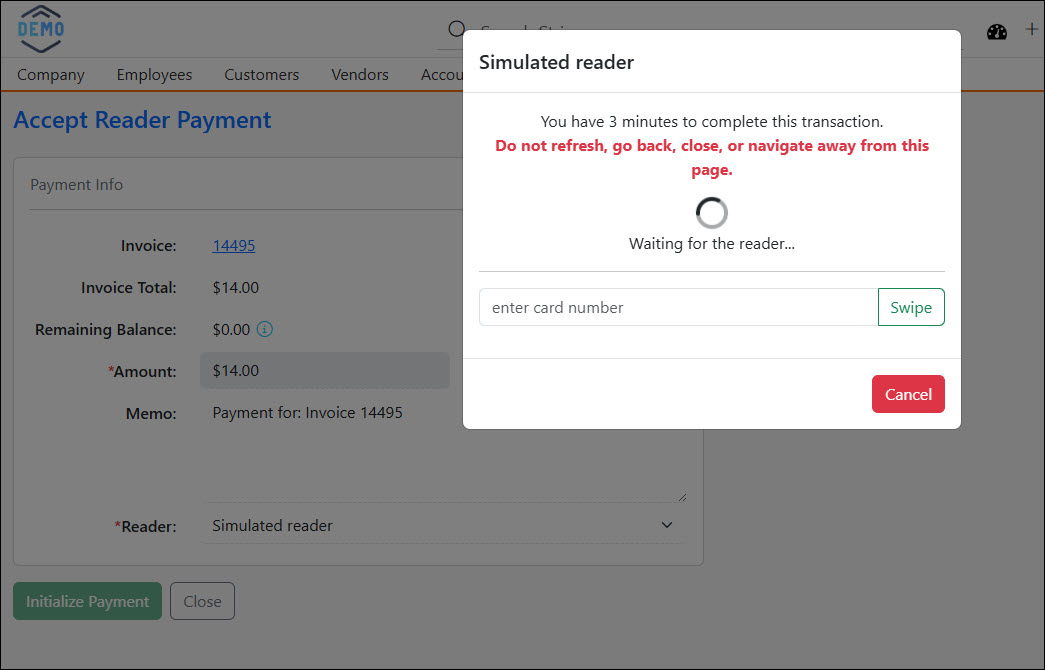
Clicking on the Use Reader button will open the Accept Reader Payment page in Striven. Below is a screenshot illustrating how the Accept Reader Payment page appears and a description of what can be accomplished there.
- Use Existing Payment Profiles: Navigates to the Add Payment page in order to select from existing Payment Profiles that have been added for the selected Customer.
- Invoice/Invoice Total: Lists the Invoice number and the Invoice Total. Clicking on the Invoice number will open the Invoice in a new tab to review further details.
- Remaining Balance: Equals the total invoice amount minus any incomplete or successful payments already created and associated to the invoice. If a payment was successfully created in Stripe but was unable to be created in Striven check back on the Invoice shortly for the Payment to reflect correctly on both ends.
- Amount: The total amount that is currently being added to the Payment for the Invoice. This field can be edited as long as the Remaining Balance field is not $0.
- Memo: This text will reflect in the memo that will be listed on the Payment that is being created and can be edited before initializing the payment.
- Reader: As long as there is a valid Stripe Reader selected from the drop-down list for Reader, you will be able to click the Initialize Payment button to begin to process the Payment.
- Save Credit Card Information: This will save the payment method to the Customer profile for future use. This option will only be displayed if you have the Allow Saving of Credit Card Payment Profiles setting selected in your Stripe Integration Settings.
- Initialize Payment: Begins the process of creating the payment in both Stripe and Striven.
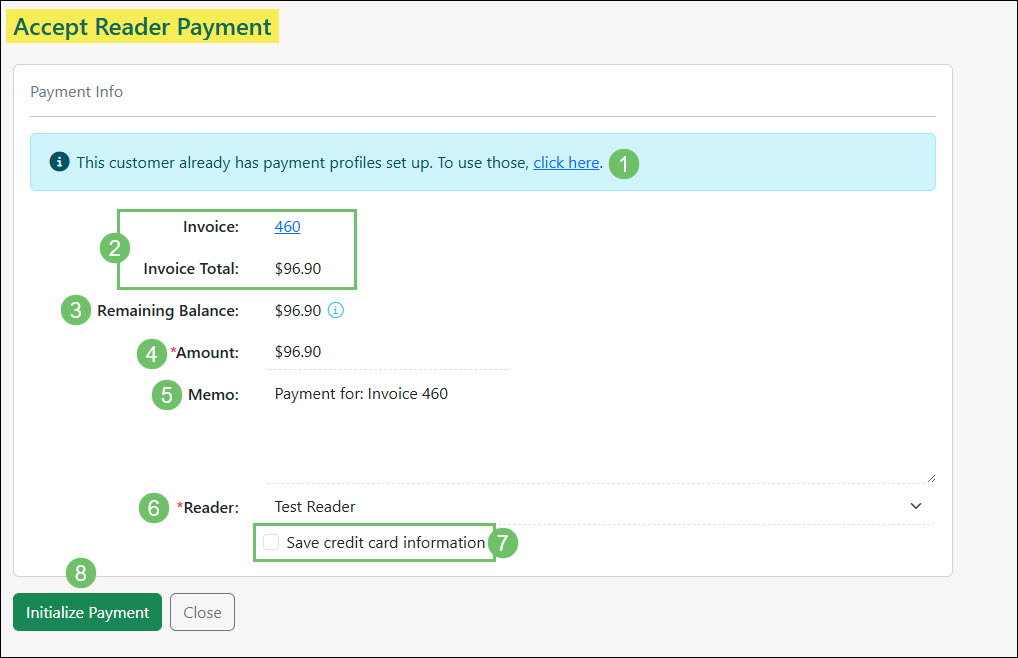
Example of the Accept Reader Page for Stripe
After clicking on the Initialize Payment button, an alert will appear on the screen with the following warning:
The Accept Reader Payment page will automatically reconnect to the reader that was in progress if the Initialize Payment button has been clicked but the page is closed or refreshed before the payment has been completed. If needed, the user can click the Cancel button to stop the payment that is being processed.
This alert will display while the system is waiting for the Customer to Tap, Insert, Enter, or Swipe the credit card to pay. This is to ensure that you do not lose your progress while waiting for the Customer to complete the Payment.
Example of the Alert Message When Using the Stripe Reader to Process a Payment in Striven
Once the Reader captures the credit card information, the Payment will process and the confirmation will display in Striven with the Payment details.
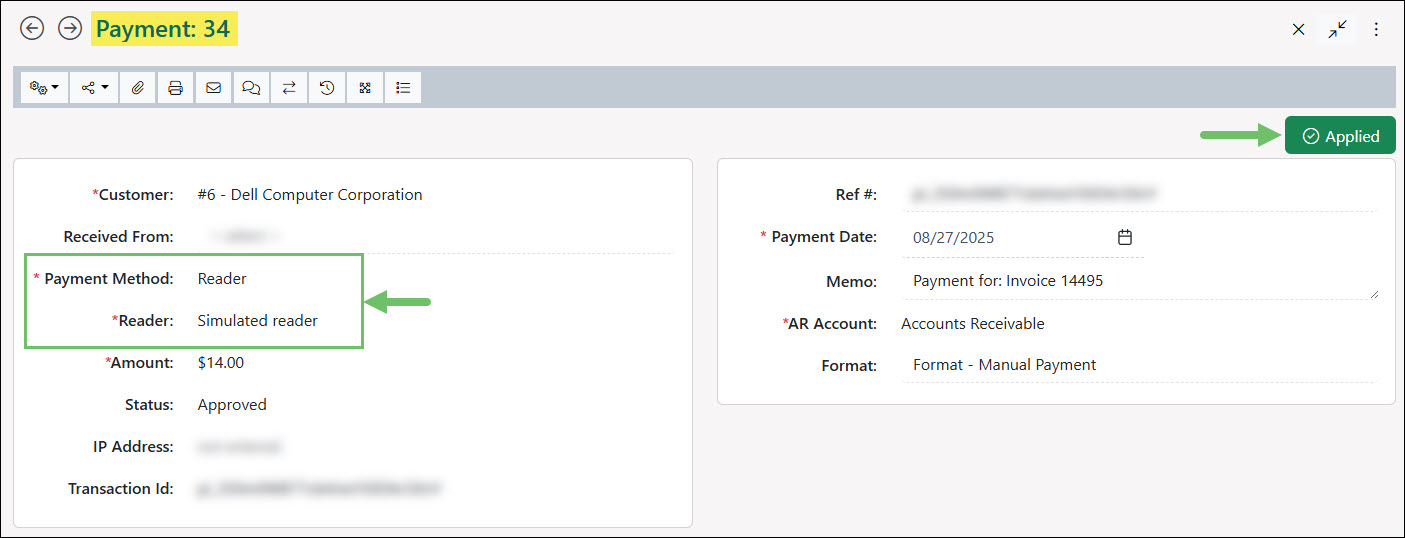
Example of the Payment Confirmation the Stripe Reader Payment was Successfully Applied to the Invoice
There are two (2) other pages in Striven from where Stripe Reader Payments can be accepted. These include the Payment page and the Sales Receipt page.
You will find the option for the Reader in the Payment Method drop-down list on these pages. This will then display a drop-down list with the most recently used Reader selected by default, as well as the option to Save the Credit Card Information if that setting was checked in your Stripe Integration Settings.
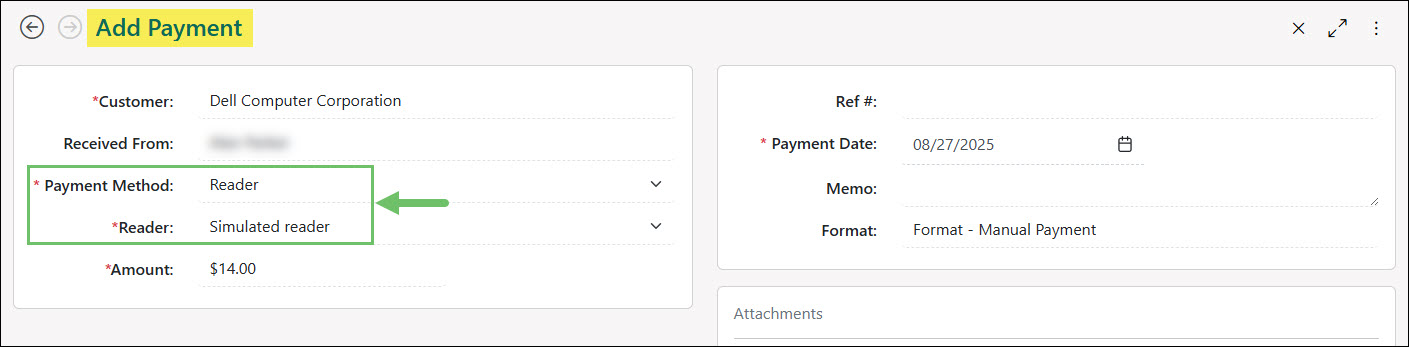
Example of the Reader Option in the Payment Methods List on the Add Payment Page
When you click to Save the Payment or Sales Receipt, an alert will display warning you to not refresh or navigate away from the page while the Customer uses their card with the Reader. Once the Credit Card is processed with the Reader, the Sales Receipt will save accordingly.
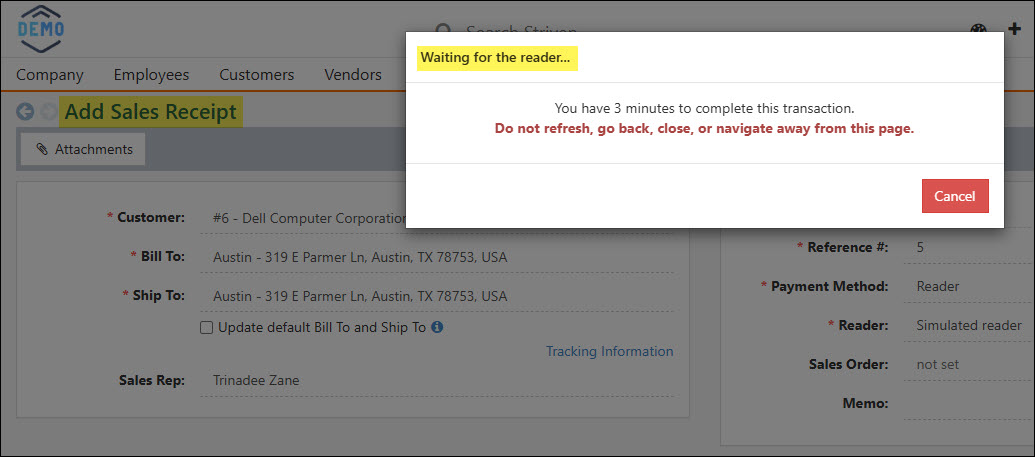
Example of the Alert Message When Using the Stripe Reader on a Sales Receipt
If the Reader is already in use on another tab or page and the user attempts to create a new Payment or Sales Receipt, they will receive this message:
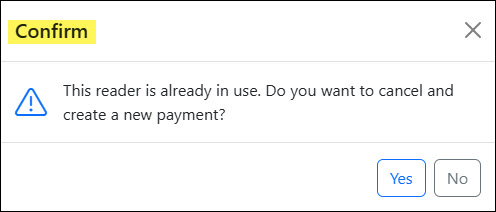
Example of Confirmation Warning that the Reader is Already in Use

Have a Question?
Ask the Striven Community
User-sourced how-to’s, feedback, and more!