
Striven Integrations
Striven for Gmail Integration
Guide
Overview
-
The Striven for Gmail Add On is a feature that can be installed to work with your Gmail inbox. By opening an email, you can utilize the Add On feature to create a Task within your Striven system from the email. The Subject of the email will become the Task Name, while the body of the email will fill in the Task Description. Any attachments or embedded images to the email will also be included as an attachment to the Task.
-
Installing the Striven for Gmail Add On
To install the Striven for Gmail Add On for your Google Chrome browser, navigate to the Google Workspace Marketplace website and search for Striven for Gmail.
- Note: You will need to be logged in to your Google Chrome browser in order to install the Add On.
On this page, you will click Install to add it to your Gmail as an Add On.
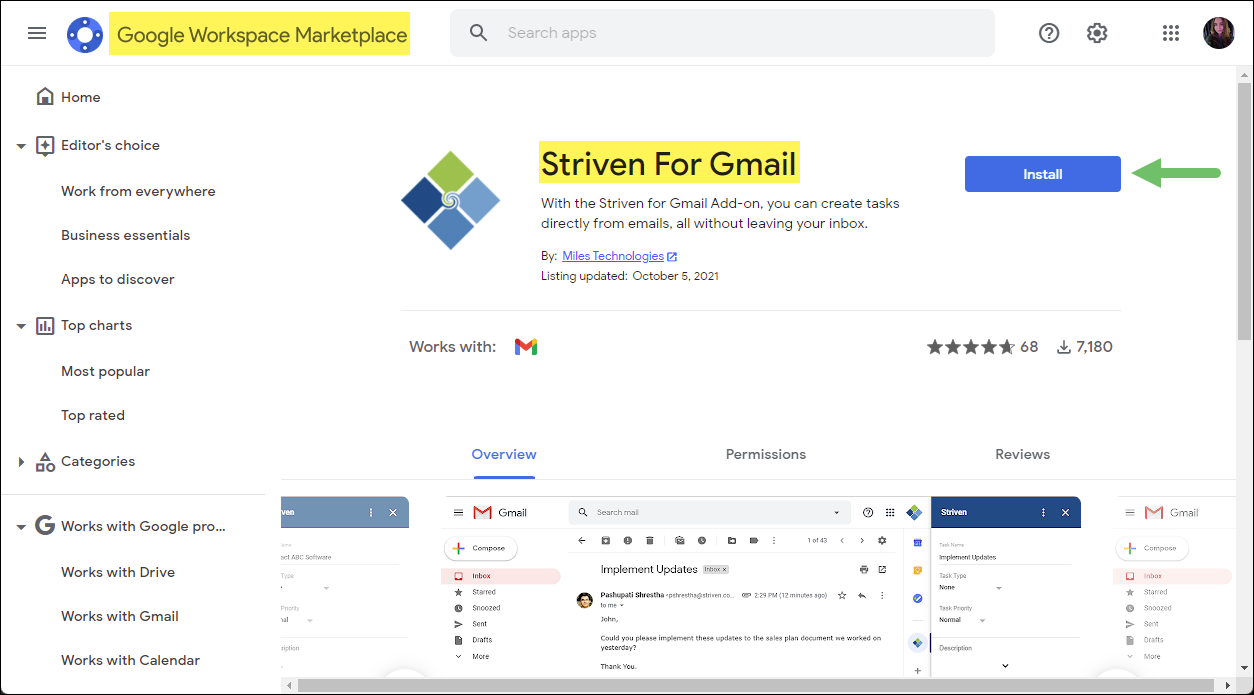
Example of Striven for Gmail Add On in the Google Workspace Marketplace

A popup window will appear requesting permission to install the Add On. You will need to click Continue to proceed with the Add On installation.
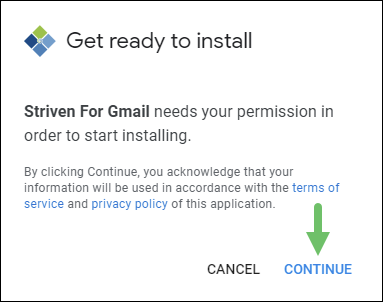
Example of Permission Request for Add On Installation
You will then be prompted to select the Gmail account you wish to associate with the Striven for Gmail Add On. Once you have selected or logged in with the correct Gmail account, you will then need to allow access to Striven for Gmail by selecting Allow.
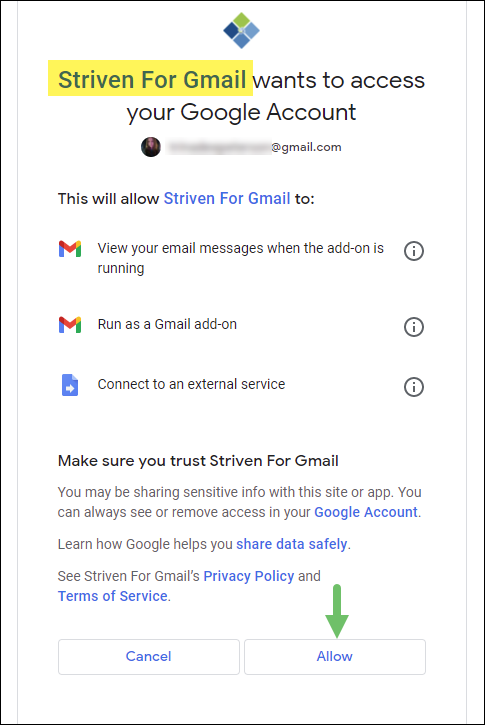
Example of Access Request for Striven For Gmail to Google Account
-
Creating a Task Using the Striven for Gmail Add On
After you have signed into the Striven for Gmail Add On, you can then open any email in your Gmail account to create a Task in your Striven system. You can accomplish this by clicking on the Striven Diamond icon on the side menu.
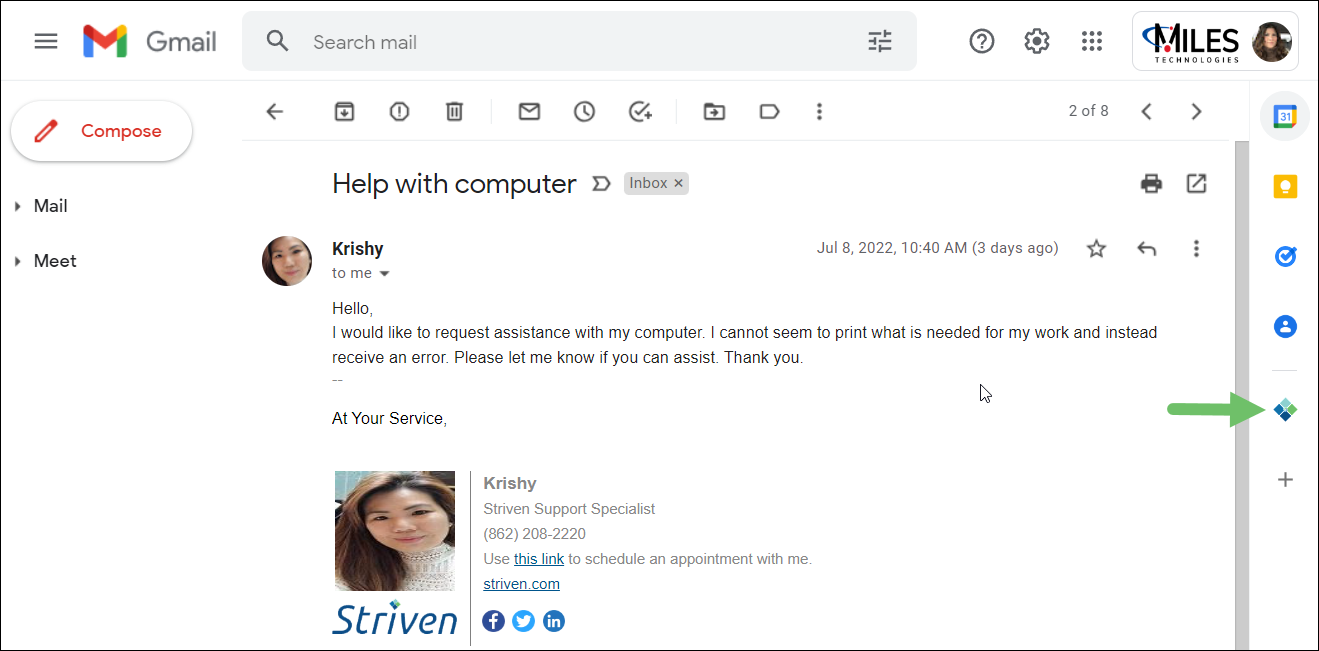
Example of the Striven Diamond Icon for the Add On Feature
This will trigger a side panel section to appear that will enable you to select the Task Type and Priority of the Task you wish to create. The Task Name and Description will auto-fill based on the Subject and Body of the email.
- Note: These fields can be edited if needed before creating the Task from your email. To view/edit the Description field, click the down arrow within the Description field area of the side panel section.
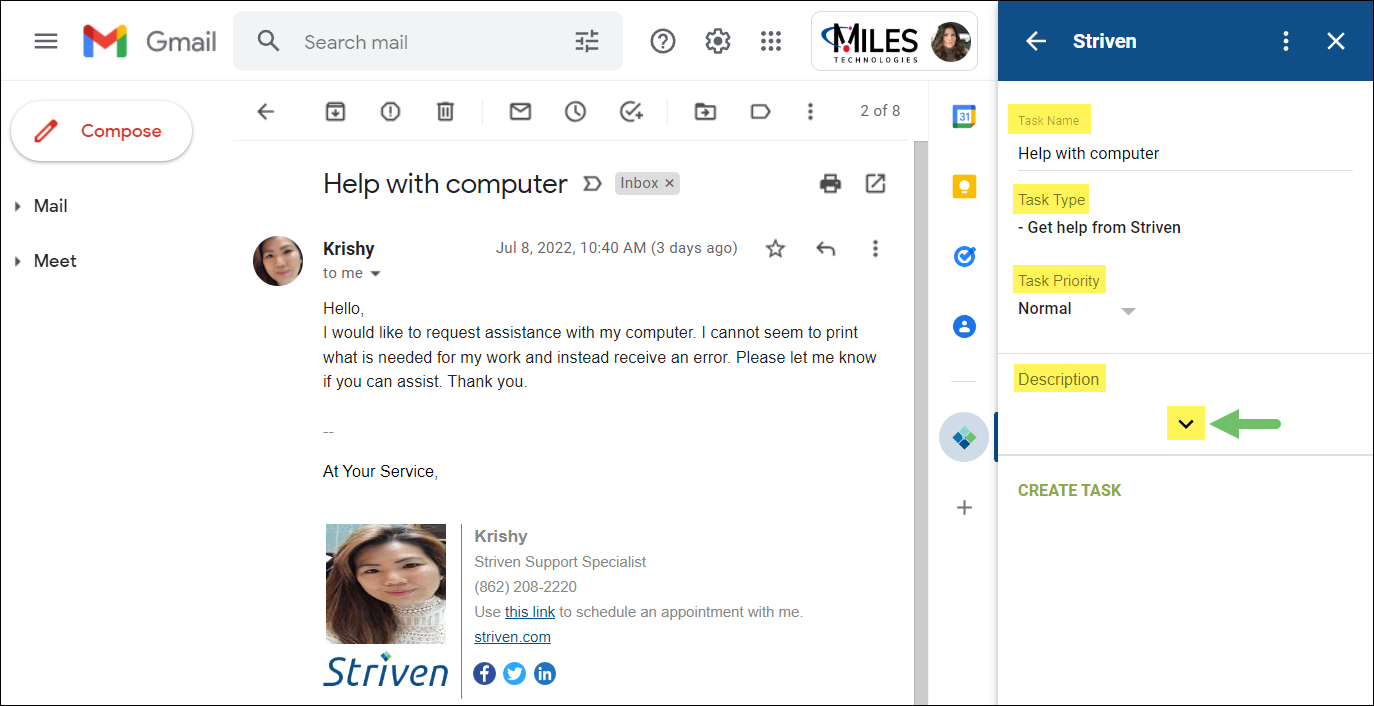
Example of the Down Arrow to View/Edit the Task Description
When you have entered all the relevant information into the Task fields, click Create Task at the bottom of the side panel section.

Example of the Create Task Link within the Add On Side Panel Section
A confirmation with your new Task # will display noting that your Task has been created successfully. You will also be provided with an Open Task in Striven link to view the Task within your Striven system.
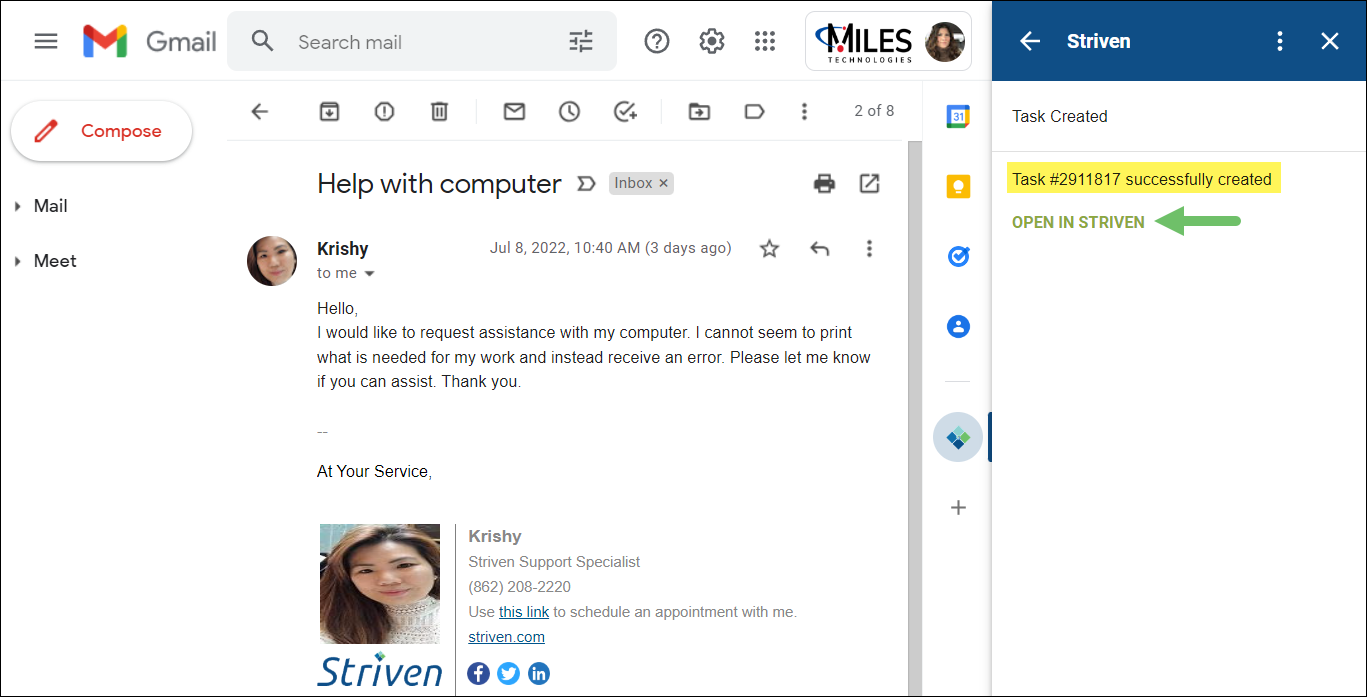
Example of the Open in Striven Option Once a Task has been Created from an Email
Clicking the Open in Striven link will navigate you to the Task Info page. A pale yellow banner will be displayed on the Task indicating that it was created from the Striven for Gmail Add On, as well as who the email was from.
- Note: If the sender of the email is not saved in your Striven system as a Contact, the Task will display the sender’s email address for reference.
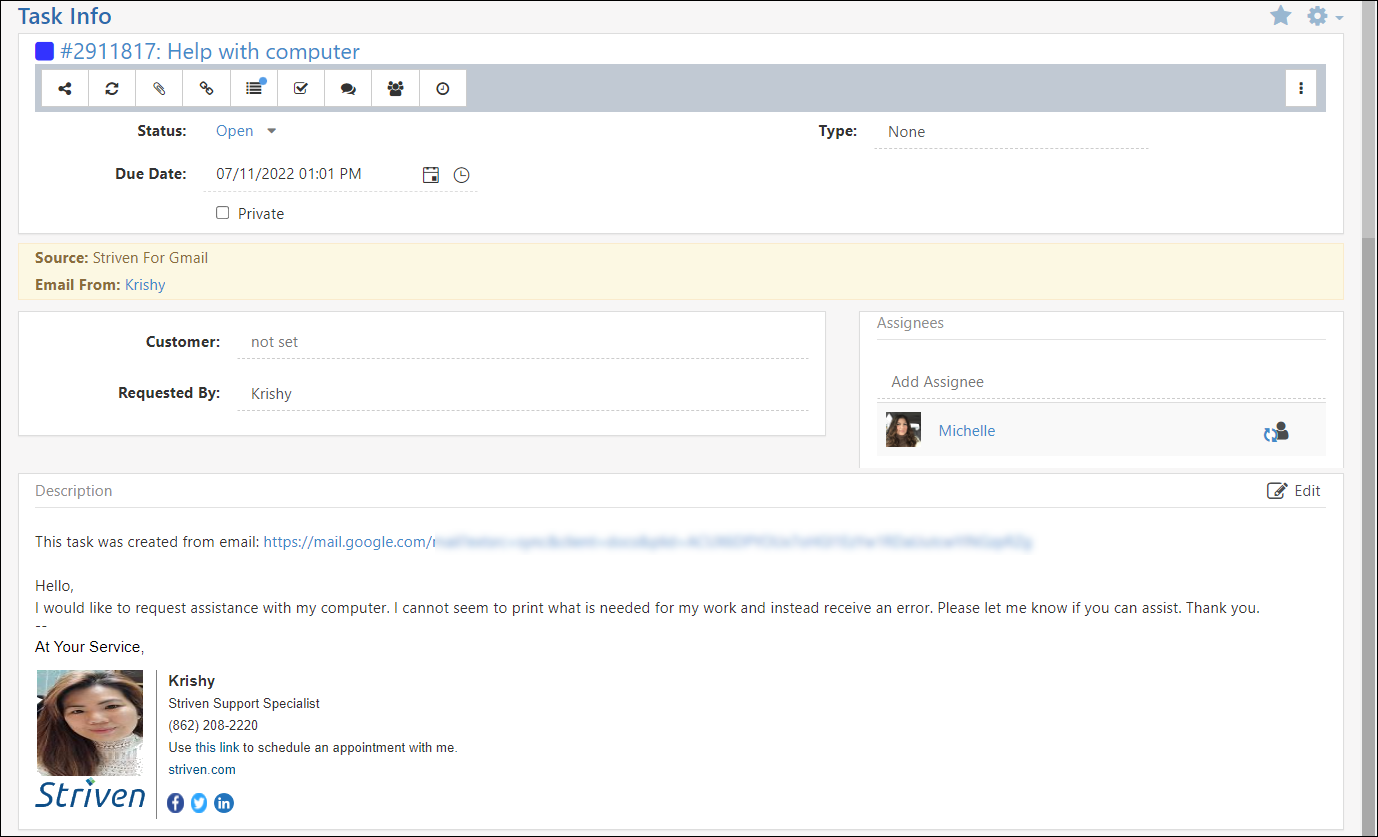
Example of the Task Info within Striven after Creating from an Email
-
Attachments
Attachments in the original email will all be preselected to be included as attachments in the Task that will be created from the Striven for Gmail Add On. These attachments can be individually deselected by clicking the check box next to each attachment. To include none of the attachments, uncheck the Select All option.

Example of Attachments Being Included with the Gmail to Task Add On Feature
Once the Task has been created in Striven, the attachments previously selected can be accessed and viewed by navigating to the Attachments icon located in the Actions Menu of the Task.

Example of Attachments Added to a Task that was Created from the Gmail to Task Add On Feature
-
Default Task Configurations
It is important to note that any default configurations you have from your Task List in Striven will carry over to the Striven for Gmail Add On option, such as the default Task Type or if you have your Tasks set to default to Private or not. You can learn more about setting up your default Task Type and Private Task settings by reviewing our Task Navigation & Management Guide.
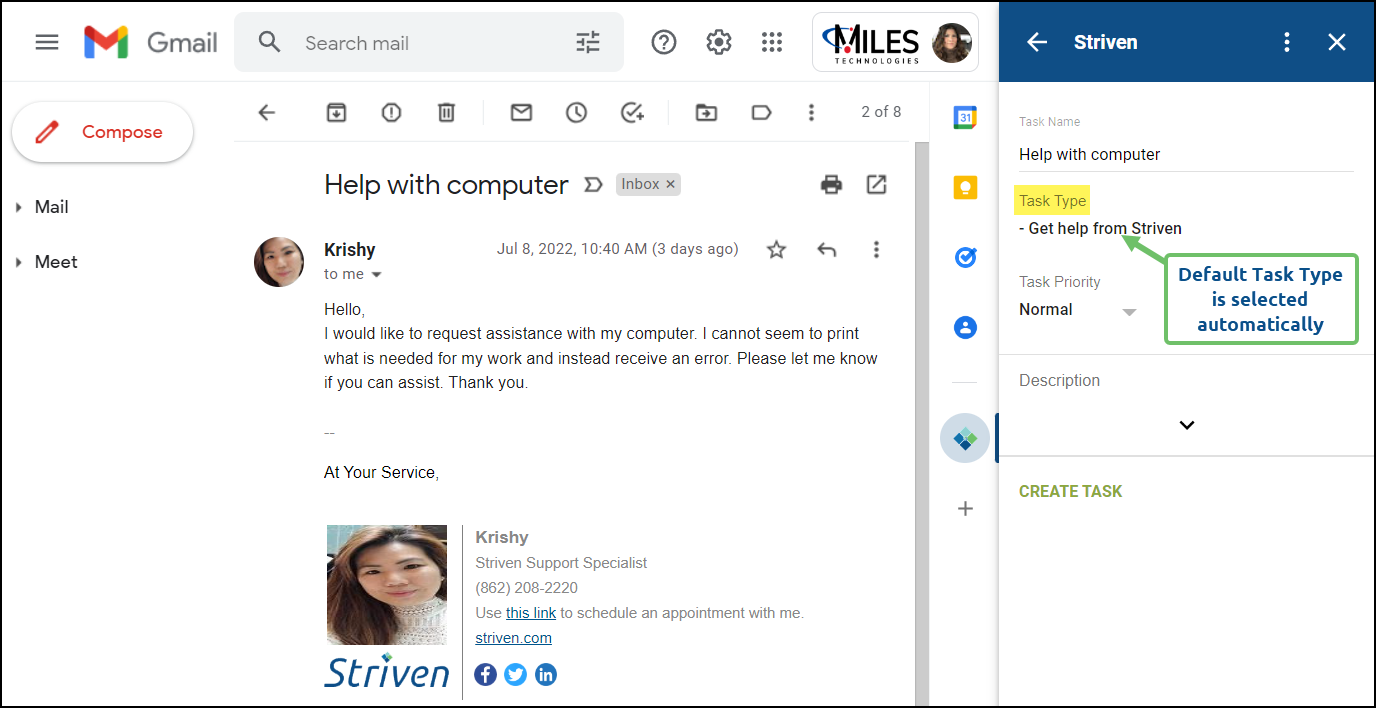
Example of the Default Task Type Setting in the Gmail Add On Side Panel Section
-
Signing Out of the Add On
If you ever need to sign out of the Striven for Gmail Add on, you can do so by clicking the kebab menu available at the top of the side panel section. Within this drop-down menu, there will be an option to Sign Out. You may then follow the signing in process again, which is described above in this guide.
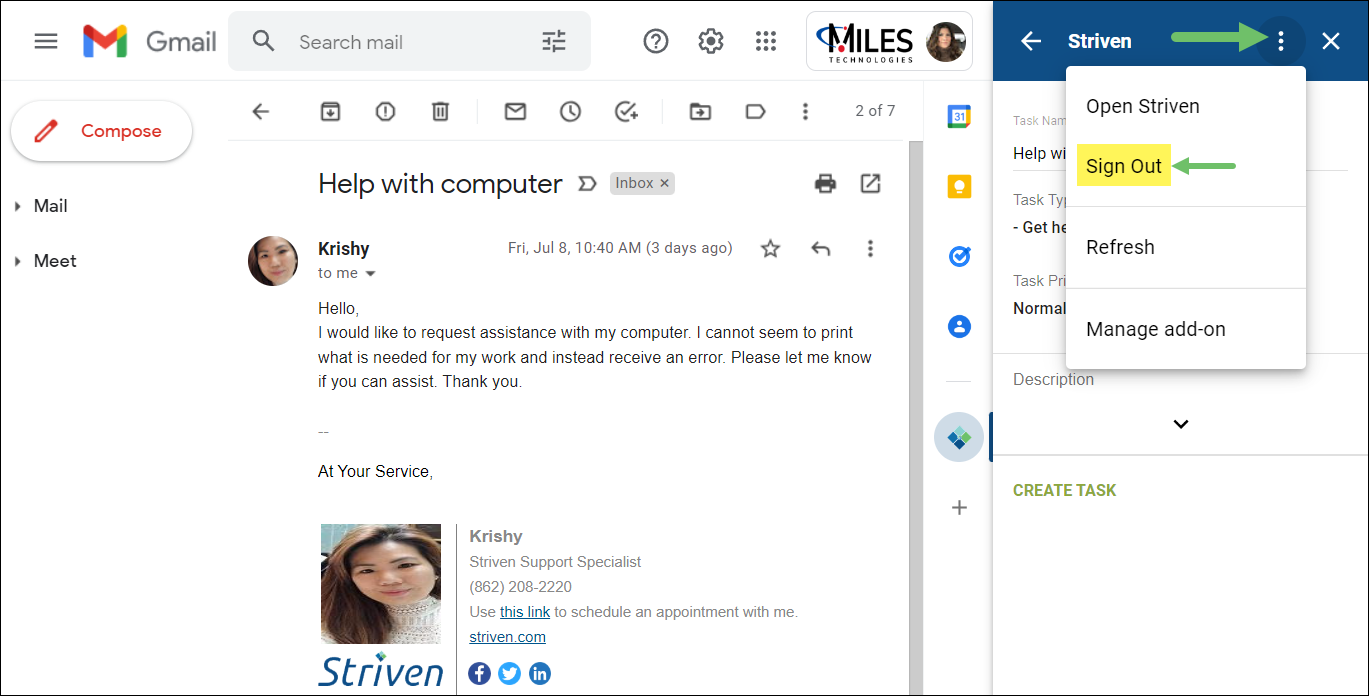
Example of Kebab Menu Option to Sign Out of the Striven Gmail Add On

Have a Question?
Ask the Striven Community
User-sourced how-to’s, feedback, and more!